Masking tutorial: Flowerbeds for springtime
Hey, all!
Stephanie with you today on the LDRS Creative blog and I'm so excited to share this project of mine I like to call flowerbeds for springtime, using the latest products in store and some masking paper!

That's right, flowerbeds. I am obsessed with them at this time of the year, because you can clearly see life appearing with the little blooms here and there. So of course, I had to play with the flower sets that were just released in February and April: the Pelagornium, Snapdragon, Magnolia and Lily stamp sets.

But to get all these flowers on the same card, I had to do a little bit (okay, a LOT) of masking. Here's how I did it.
TUTORIAL
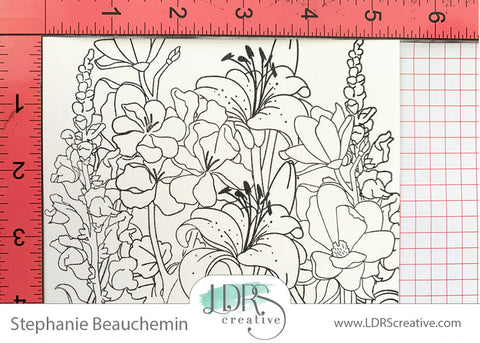
First, I played with the different stamps on my A2 panel to see where they would fit best and what I would like to have at the forefront.

Next, I stamped the two flowers I had selected with Raven hybrid ink and created a mask to go on top of them.

After that, I slowly stamped my way through with more flowers, masking, stamping, until I was satisfied.

This is the final look without all the masks, before coloring in with alcohol markers.
TIP: Coloring the background first helps a lot with distinguishing what goes where!
When the coloring part was done, all I had to do was to adhere the panel to an A2 cardbase, trim any excess that would show at the edge.
I completed the project with a sentiment from the Get Well 4x4 Sentiment Stack and the coordinating Sentiment Stack banner die set.

And that is it! Final look!

I hope this brings some joy to you today and I cannot wait to share more in the upcoming days!


Beautiful floral arrangement, your colouring is breathtaking!
Leave a comment