Butterfly Pirouette
Hello again, It's Jen here and I'm back to share my latest card design with you all.
The Spring Collection has recently been released and its gorgeous as always. I fell in love with the Tulip 4x6 Stamp Set – LDRS Creative as soon as I saw it.
The tulip image is stunning but for some reason I was drawn to the butterfly stamp in this set and felt it was the perfect size for a pirouette style square card.

I started by taking some heavy white card stock cut to 4 1/4 inches x 4 1/4 inches. I placed the master template and the spiral template from the Pirouette Pattern Templates – LDRS Creative in my stamp positioner and added the butterfly stamp at an angle. I stamped it in a pale coloured ink and rotated it as per the instructions until I had a complete circle of butterflies. Next I added the tiny heart stamp from Campfire Friends - Pocket Pals 4x6 Stamps – LDRS Creative and stamped in a pale coloured ink inbetween each butterfly to create a fun pattern.
Next I took 8 different coloured cardstock scraps from my craft stash in rainbow order. I stamped the butterfly again in Watermark Emboss Pad – LDRS Creative, sprinked on some white embossing powder and heat set it with my heat gun.
I used the cordinating dies from the Tulip die set and Campfire Friends - Pocket Pals Coordinating Dies – LDRS Creative to cut out the butterflies and some hearts from grey cardstock.
I used the card front that I'd stamped earlier in the light coloured ink as a guide. I added foam tape to the butterfiles and placed them on top of the stamped images in rainbow order. I added the grey hearts over the stamped heart images for some added interest. However I adhered these flat for some added dimension.
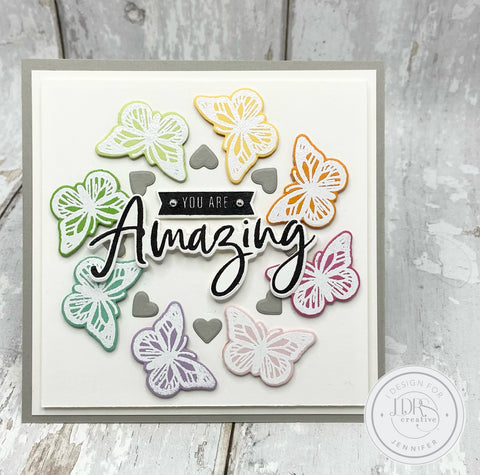
For the sentiment I used the large "Amazing" word stamp from Dahlia 4x6 Stamps – LDRS Creative and the small banner from Homegrown With Love Stamps – LDRS Creative and stamped them in Raven – LDRS Creative ink. Then cut them out using their coordinating dies Dahlia Coordinating Dies – LDRS Creative and Homegrown With Love Die Set – LDRS Creative. After popping the sentiments up on some foam tape, I added them to the front of the card.

To create more dimension I glued some fun foam to the back of the card front and layered it onto more white card stock measuring 4 1/2 inches square and matted that onto a 4 3/4 inch grey card base.
As a final touch I added to tiny silver pearls to the small sentiment for a little sparkle!!
So there you go, you dont always need to use the main image of a stamp set as the focus of your card. The smaller images can be just as beautiful used on their own.
I'll catch you all again soon!


Leave a comment