Basic Masking Technique ~ Puppy Time
Hello Friends,
Welcome back to LDRS Creative. DT Melanie here today and I have a super easy project using our new LDRS Creative Stamping Mask Paper along with the Puppy Time Stamp Set.

As soon as I saw these adorable puppies I immediately thought of using them for a masking technique. This stamp set also INCLUDES the coordinating dies so you get more bang for your buck!

Here is my finished card. These puppies are so adorable. When you mask stamps like this the final result looks as if it was one stamp. It even tricked my husband. Let me show you how easy it really is to do.
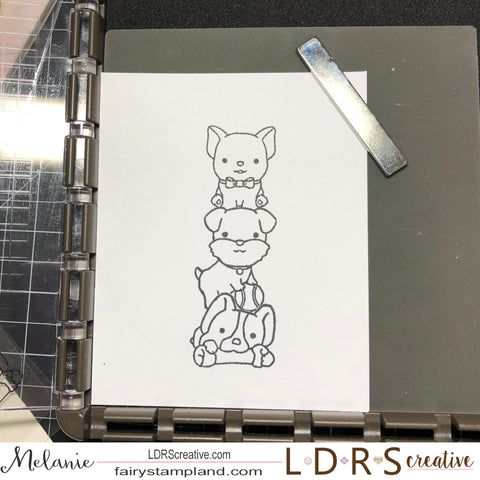
Step 1: For this project I used a positioning tool for easier placement but because these are clear stamps it really isn't necessary. I have stamped the bottom dog onto my white card stock (on the right) and then I stamped it again on masking paper ( on left). Fussy cut the masking tape image.

Step 2: In this photo I am placing the "mask" that I fussy cut from the masking paper and I am sticking it down over the stamped image on the card stock.

Step 3: Stamp your second image right on top of the bottom image. When you peel away the masking tape you will see the magic begin to emerge.

Step 4: Next use the masking paper again to mask off the puppy's head so we can stamp the top puppy.

Step 5: Remove the masking paper.

Step 6: Now your little guys are ready to color :-)
Here is a close up of the coloring. I have also used the Dewdrop Border Die
in the background.

I hope you have enjoyed today's post.
(Hugs)
Melanie


How darling!
Carla from Utah
I luv this technique of masking, stacking and creating such a fun card like this. Thanks for sharing.
Leave a comment