No-line Ice Cream and Scalloped Fringe

Hello my fabulously creative friends! Kassi here for LDRS Creative.
I don't know about you, but I kinda love ice cream! It's one of those things that can make a bad day a better...
The only problem is my scale doesn't love ice cream as much as I do... LOL!
So let's make some 0 calorie ice cream that everyone can enjoy!

LDRS Creative shopping list:
Ice Cream Party stamps
Candy Counter 6x6 paper
Alloy ink
Coffee Bean ink
Fringe die
Scalloped Border die
Ready to jump into some stamping? Let's get started!

To get a faint stamped image for no-line coloring, use a sponge to daub Alloy ink onto the stamp, then stamp as usual. We are going to keep stamping this way until otherwise specified.

Start with the cherry... stamp and mask.

Stamp and mask the ice-cream scoop.

Let's make it a double... stamp another scoop of ice-cream!

Move the ice-cream scoop mask down to the bottom scoop and stamp your cone.
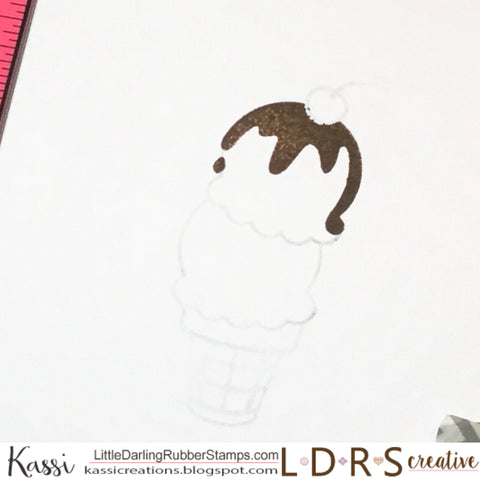
Ok... Now that we have our ice-cream and cone stamped, we can move on to the toppings. Leave the mask on the cherry, and stamp the chocolate sauce... For this, we don't need to worry about being faint, so go ahead and ink up your stamp the normal way.

Time to add some color!
I went with vanilla ice-cream... When coloring white (especially with no line coloring), you still need to define your shape by coloring the shadows.

Now that our ice-cream is colored, and the shapes and shadows are defined, let's spice it up a bit..
Create a reverse mask by stamping the ice-cream scoop in the center of a square of Stamping Mask Paper and cut the ice-cream out while leaving the outer part of the mask in tact. Now place that over the bottom scoop of ice-cream so you can see the scoop in the mask window. (make sure you mask the top ice-cream scoop again!)

Let's turn that vanilla into chocolate chip by stamping the sprinkles through the reverse mask.
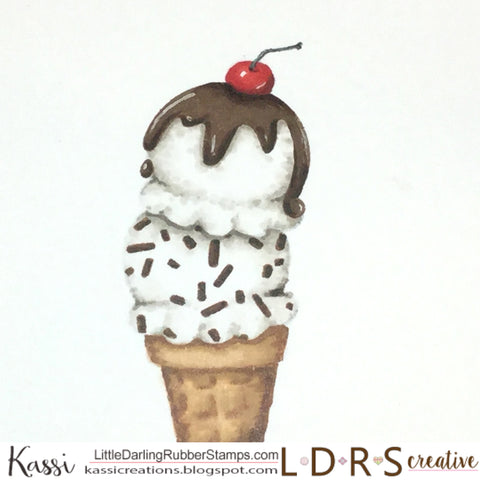
When all the masks are removed, you have an ice-cream cone that looks absolutely delicious!!

You can save your masks and reverse masks by sticking them on a sheet of acetate and storing them with your stamps... this way you can use them over and over!

Now let's add color to our card... Die cut 3 strips of fringe from the rainbow stripe paper.

The smallest of the Scalloped Border dies fits perfectly with the fringe. When you combine the two you end up with fringe with a soft scalloped edge... I LOVE this!

Attach your fringe to your card in rows. "Fluff" up the fringe to give added dimension and texture to your project!
To finish up, you can embellish however you want! I kept it simple with a little ruffled ribbon and a few rhinestones.
Now it's your turn! If you give this technique a try using LDRS Creative products, we'd love to see! Share with us in the FaceBook group! (the group is also a great place to ask questions!!)
If you are looking for more inspiration, be sure to check us out on Instagram, YouTube, and Pinterest!
And check back here tomorrow for another incredible project!
See you soon!


Leave a comment